When the mortar that holds the bricks together of your chimney deteriorates, it becomes an issue that should be addressed. Often, the process of repairing these damaged areas is referred to as tuckpointing.
Baltimore Chimney Repair is an important step in maintaining your fireplace, as it ensures safety and longevity. Here are some signs it is time to call in a professional:
Even well-made brick structures can suffer from deteriorating mortar joints. The damage occurs when the old mortar is damaged or worn out, allowing moisture to penetrate the wall and freeze in cold weather, which will cause further damage and possibly lead to structural collapse. If you notice that the mortar joints are cracked, crumbling or missing entirely, it is important to repair them immediately.
Mortar joint repair is called tuckpointing, and it is a DIY project that can be completed by anyone who has the skills to do the job safely and effectively. Before you attempt the repair, make sure you have all of the necessary tools and materials. These can be found at most hardware stores and home centers, which also sell ready-mixed mortar. You will need a small sledgehammer and a cold chisel to remove the old mortar from the surface of the bricks. It is important to wear protective gear, including safety glasses and gloves, to avoid injury.
After removing the damaged mortar, clean the repair area to remove any debris and sand the bricks to smooth them. Once you have prepared the repair area, mix a batch of mortar to match the color of the existing mortar and apply it to the damaged joints. It is important to finish each joint as you fill it to prevent “popouts” when the new mortar is cured.
Depending on the extent of the damage, you may need to use a brick cutter or a metal chisel to cut the old mortar back at a 45-degree angle and repoint it. It is important to follow the proper technique when cutting the new mortar to ensure that it bonds properly to the existing brick. It is also important to keep in mind that the new mortar will need to be packed tightly in order to provide a strong, water-resistant joint.
Mortar joint repair is a complex task, and it is often best to hire a professional mason for extensive repairs, particularly on tall buildings or chimneys that require scaffolding to access. A mason will also have experience working with historic structures and can maintain the integrity of these buildings while repairing aging masonry.
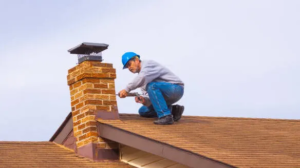
Loose Bricks
Oftentimes, loose bricks are caused by the expansion and contraction of the chimney structure. This movement, over time, causes the mortar to crack and crumble. This is a leading cause of water intrusion and moisture damage in the home. To prevent the problem from getting worse, homeowners should look for and repair any cracks in the chimney mortar.
If you do find a loose brick, first try to remove it by gently tapping on the surface of the mortar with a hammer or a chisel. If it doesn’t come out, it’s time to take more drastic action. The most effective way to do this is to dig down into the brick and the mortar, using a chisel and a hammer until you can remove it.
After removing the loose brick:
- Make sure the surrounding area is free of debris.
- Blow out or sweep the area and clean it thoroughly, ensuring that the area will accept new mortar.
- Mix the mortar, following the manufacturer’s instructions.
- Try to match the color as closely as possible to the existing brick. If you’re not able to find a mortar that matches, try adding pigments to the mortar mix to obtain a suitable color.
While you’re working on the mortar, use a brush or a wire brush to scrape any moss and other debris from the bricks in the area. Once the area is clean, dust it off with a dry masonry brush and dampen the surface with a hose to improve mortar adhesion.
Once the new mortar is ready, “butter” the bottom and both sides of the replacement brick with a trowel, then slide it into the opening. Butter the top of the brick as well, ensuring that all seams are even. When the replacement brick is in place, use a pointing trowel to smooth the joint edges.
While minor cracks can be repaired with a simple caulk gun and high-heat mortar, larger cracks may require more extensive repairs. These types of repairs are typically handled by a mason in a process called tuckpointing. A professional mason will use a grinder to prepare the mortar joints, then replace them with fresh mortar.
Efflorescence
If you’ve noticed a powdery white substance on your brick chimney, it may be efflorescence. Efflorescence is a clear sign of moisture damage and is an indication that your chimney has issues you should address right away.
Often referred to as “whiskers,” this white, powdery residue shows up on the surface of brick, stone, concrete and other porous building materials. It’s the result of excess water in the brick or other material dissolving salts and minerals. When that water evaporates, it leaves behind the telltale chalky white residue that many homeowners and building managers love to hate.
The conditions that trigger efflorescence are fairly straightforward: The masonry has to contain sufficient soluble-salts, there needs to be moisture present and that moisture has to reach the surface of the masonry where it mixes with those soluble-salts. When that mixture dries out, it leaves behind the visible, crystalline deposits we know as efflorescence.
Depending on the specific mineral content of the masonry, it can take on a variety of hues from light to dark gray or even blue, green or brown. The crystalline residue can also be very coarse or even sandy.
If you see signs of efflorescence on your chimney, it’s important to get it cleaned immediately by a professional. Leaving efflorescence untreated will only hasten the deterioration of your chimney. Chimney professionals can use a non-corrosive cleaning solution to remove the deposits and protect your masonry against further damage.
While it might be tempting to try removing the white stains yourself with a power washer, this can actually damage your bricks. A sanding process is more effective, but it’s important to hire a professional to ensure you don’t accidentally damage your chimney’s structure.
If your chimney has efflorescence, it’s a good idea to have your flue liner replaced as soon as possible. A damaged flue liner can allow water to deteriorate your chimney’s masonry and could lead to spalling bricks and other serious problems down the road. A new, stainless steel flue liner can keep your chimney water-free and help prevent a costly chimney repair bill in the future.
Melting Siding or Roofing
If your chimney siding starts to melt, this is a sign that there is a problem with your cladding or chimney flashing. This is a dangerous situation, as it could allow water to penetrate your chimney system. Water leaks aren’t just unsightly, they can lead to mold growth and structural damage inside your home. If you notice that your chimney cladding is melting, you need to call a professional right away.
Chimney cladding is designed to protect the vulnerable joints and intersections where your chimney meets the roof from harsh weather conditions. While metal is impervious to heat, vinyl can melt when exposed to excessive amounts of sunlight or high temperatures. The easiest way to prevent this is by installing a chimney awning that will block the sun’s rays. This will also help you save on energy bills.
Another option is to replace your vinyl chimney siding with a higher-quality material that can resist the heat of your chimney and surrounding environment. High-heat chimney siding is more expensive, but it can withstand temperatures of up to 200 degrees Fahrenheit. It’s best to install this type of chimney siding in areas that are sheltered from direct sunlight, such as a porch or a shady area.
Window reflections have caused more chimney melts than many homeowners realize. This is a growing issue as more homes use Low-E windows that have a special coating that reflects heat. These windows are designed to make your home more energy efficient, but they can also cause melted vinyl siding if they reflect off of nearby walls or fences.
If you notice that your vinyl siding has started to melt, it’s important to determine what the source of the problem is so that you can repair it before it gets out of hand. The first step is to have a certified chimney sweep perform a complete inspection. This is especially important if the melted vinyl siding is adjacent to the fireplace or other sources of high heat. An overheated chimney can be a fire hazard and should never be ignored.